Best DPI and PDF Settings for Scanning Receipts and Small Text (So It’s Readable and Still Small)
If you’ve ever tried to scan a receipt or a document with tiny print (medication labels, shipping slips, warranties, utility bills), you’ve probably hit the same problems:
- The text looks fuzzy when you zoom in.
- OCR can’t read it, so you can’t search inside the PDF.
- The PDF file is huge for no good reason.
The fix is rarely “buy a better scanner.” It’s almost always choosing the right DPI, color mode, and PDF compression settings for the type of paper and print you’re capturing.
This guide gives you a practical setup that works for most people, plus a few “when to change it” rules so you don’t waste time experimenting.
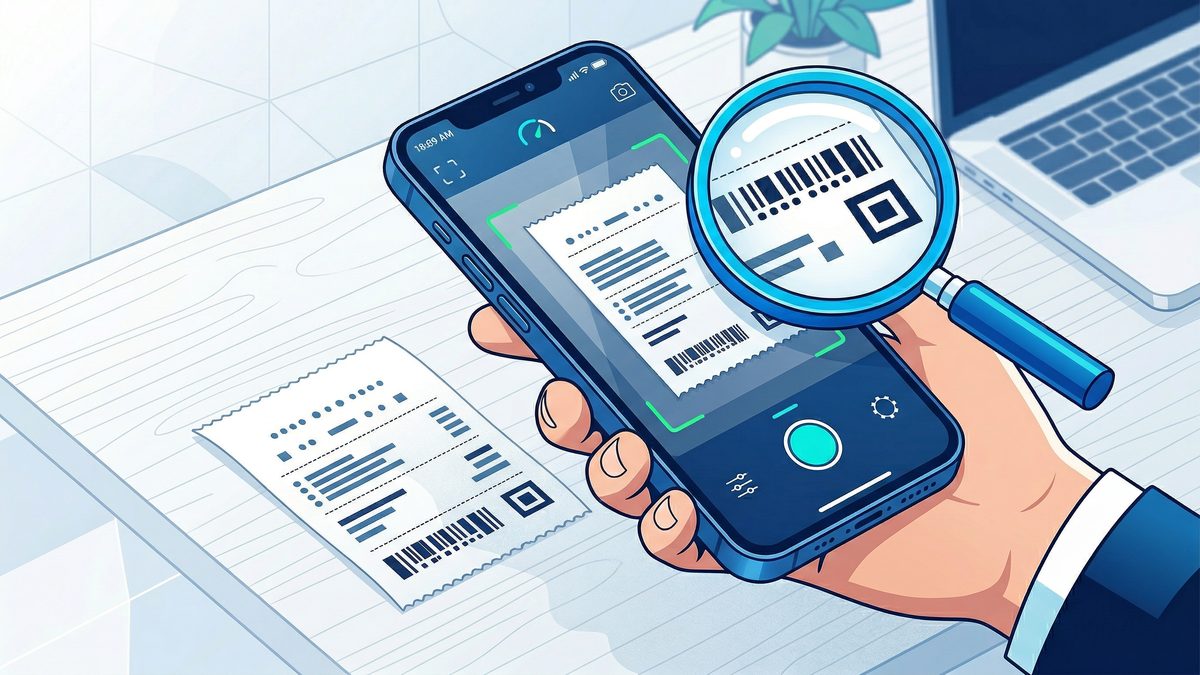
Along the way, you’ll see how PDF Scan Fast can help you capture a clean, shareable receipt PDF from your phone—without dealing with confusing scanner menus.
Quick answer: the best default settings
Use these as your baseline for receipts and any small-text document.
If you scan with a phone (recommended for receipts)
- Mode: Grayscale (or “Document” mode)
- Resolution: Let the app choose automatically, but aim for the equivalent of 300 DPI quality
- Output: PDF
- Enhancement: Auto-crop + deskew + contrast/“clean” filter
If you scan with a flatbed/ADF scanner
- Color mode: Grayscale
- Resolution: 300 DPI
- Output: PDF
- Compression: Medium (balanced)
- If OCR matters: Enable OCR after scanning (don’t rely on low-res scans)
If you only remember one thing, remember this: 300 DPI grayscale is the sweet spot for legibility and file size.
What DPI actually means (and why receipts are tricky)
DPI stands for “dots per inch.” Higher DPI captures more detail, which helps with:
- Tiny fonts
- Light print
- Faded thermal receipts
- OCR accuracy
But higher DPI also increases file size—especially if you scan in color.
Receipts are tricky because:
- Thermal paper fades and often has low contrast.
- The paper curls, creating shadows.
- Many receipts use thin strokes that blur easily.
That’s why “just scan it” often fails unless you use the right settings.
Best DPI for receipts (with a simple decision table)
200 DPI: only for large, high-contrast text
Use 200 DPI if:
- The receipt has bold, large print
- You only need a quick record (not OCR)
- You’re scanning many receipts and file size is your top priority
Downside: small print and item lines can become hard to read when you zoom.
300 DPI: best overall choice
Use 300 DPI if:
- You want the receipt readable at 200–300% zoom
- You want OCR to work reliably
- You need a balance between quality and size
This is the best default for most people.
400 DPI: for very small text or low-quality print
Use 400 DPI if:
- Text is tiny (e.g., serial numbers, drug labels)
- The receipt is faint or partially faded
- OCR keeps missing characters at 300 DPI
Downside: file size increases noticeably.
600 DPI: rarely necessary for receipts
Use 600 DPI only if:
- You’re archiving something where micro-detail matters
- You plan to do aggressive edits later
For typical receipt storage and submission, 600 DPI is usually overkill.
Color vs grayscale vs black-and-white: what to choose
Grayscale (best for receipts)
Grayscale captures more detail than pure black-and-white, but keeps file size reasonable.
Choose grayscale when:
- The receipt is faded
- The paper texture creates noise
- You need OCR/searchable text
Color (only when color conveys meaning)
Choose color when:
- You need to preserve highlights, stamps, or colored ink
- It’s a form with color-coded sections
Color is usually a waste for plain receipts and can increase file size a lot.
Black-and-white (1-bit) — use carefully
Black-and-white can create tiny file sizes, but it can also destroy detail.
Use it when:
- The print is very dark
- The paper is flat and evenly lit
- You don’t need fine gradients
Avoid it for faded receipts—binarization can make text break up.
The most common reason receipt scans look bad: lighting and shadows
Before you change any setting, fix the capture conditions.
A 30-second checklist
- Place the receipt on a dark, matte surface (reduces glare)
- Smooth it flat (book or clipboard helps)
- Use bright, even light (near a window works)
- Avoid direct overhead glare (tilt slightly)
If you’re scanning on your phone, an app that auto-detects edges, straightens the page, and boosts contrast will do more for quality than cranking DPI.
For that workflow, PDF Scan Fast is designed to turn quick phone captures into clean PDFs you can send or store—especially for everyday paperwork like receipts.
PDF settings that affect quality and file size
Once DPI and color mode are right, the next big lever is compression.
JPEG vs ZIP vs “optimized” settings (plain-English version)
Many scanner apps hide these details, but the idea is simple:
- Lossy compression (often JPEG/JPEG2000): smaller file, may introduce artifacts
- Lossless compression (often ZIP): larger file, preserves detail perfectly
- Optimized/Adaptive: tries to keep text sharp while shrinking photos/background
For receipts, you usually want optimized/adaptive compression.
Keep text sharp: deskew + contrast beats “high quality”
If the page is tilted or low contrast, OCR will struggle even at high DPI.
Prioritize these enhancements:
- Auto-crop (remove table/background)
- Deskew (straighten)
- Contrast/“clean” filter (increase separation between text and paper)
- Background removal (optional; can help thermal paper)
How to scan receipts so OCR works (searchable PDFs)
If your goal is to be able to search “Uber” or “Home Depot” inside your receipts later, you need two things:
- A clear scan (usually 300–400 DPI grayscale quality)
- OCR run on top of it
Practical tips:
- Make sure the receipt fills most of the frame
- Avoid motion blur (rest elbows on the table)
- Don’t over-filter to the point that characters break apart
If you’re building a simple digital filing habit, pair this article with how to name scanned PDFs (/en/blog/how-to-name-scanned-pdf-files) and organizing digital documents (/en/blog/organize-digital-documents-tips).
Also useful: how to scan documents with your phone (/en/blog/how-to-scan-documents-with-phone-2026), best PDF scanner apps (/en/blog/best-pdf-scanner-apps-iphone-android-2026), and OCR basics (/en/blog/ocr-technology-explained-how-phone-reads-text).
Recommended workflow: phone scanning + consistent naming
For most people, the fastest reliable workflow looks like this:
- Scan receipt on your phone to a clean PDF
- Name it consistently (vendor + date + amount)
- Store it in one “Receipts” folder (cloud + local backup)
- (Optional) Tag or spreadsheet important ones
If you’re doing this for taxes, also see: how to scan receipts for tax season (/en/blog/how-to-scan-receipts-tax-season-2026).
Edge cases: when to change settings
If your PDFs are too large
Try these in order:
- Switch Color → Grayscale
- Reduce 400 DPI → 300 DPI
- Use “Medium” or “Optimized” compression
- Scan only what matters (crop tightly)
If text is still blurry
Try:
- Improve lighting and flatten the receipt
- Increase 300 DPI → 400 DPI
- Use grayscale (not black-and-white)
- Clean the camera lens (seriously)
If edges are cut off
Use an app with better edge detection and re-crop manually if needed.
If you frequently scan multi-page paperwork (invoices, contracts), also read: how to scan multi-page documents into one PDF (/en/blog/scan-multiple-pages-into-one-pdf) and how to scan and send documents from your phone (/en/blog/scan-and-send-documents-from-phone).
If your work involves signing what you scan, see how to sign a PDF on your phone without printing (/en/blog/how-to-sign-pdf-on-phone-without-printing) and our breakdown of e-signatures vs wet signatures (/en/blog/e-signatures-vs-wet-signatures-legal-validity-2026).
A simple “best settings” cheat sheet
- Receipts (typical): 300 DPI, grayscale, optimized compression
- Faded thermal receipts: 400 DPI, grayscale, stronger contrast, background cleanup
- Color forms: 300 DPI, color, optimized compression
- Text-only black print: 300 DPI, grayscale or B/W depending on contrast
Where PDF Scan Fast fits in
If you want a no-fuss way to capture receipts and small-text documents from anywhere, PDF Scan Fast helps you:
- Scan from your phone and save as a PDF
- Keep pages clean with auto-crop and straightening
- Share PDFs quickly when you need to submit an expense
It’s especially useful when you’re traveling, working remotely, or handling paperwork on the go.
For more mobile workflow ideas, you might also like mobile document security basics (/en/blog/document-security-mobile-guide) and the bigger picture guide on how to go paperless at home (/en/blog/go-paperless-at-home-save-money).
CTA: make receipt scanning painless
Pick one setting to standardize on this week: 300 DPI grayscale quality.
Then build the habit: scan, name, store.
When you want the fastest path from “paper in your hand” to “PDF ready to submit,” open PDF Scan Fast and capture it in seconds.
Try PDF Scan Fast Free
Scan, sign, and organize your documents in seconds. Available on iOS and Android.
Related Articles
How to Fax From Your Phone in 5 Minutes (2026 Guide)
No fax machine needed. Learn the fastest ways to fax from iPhone or Android, plus tips to send clean PDFs that won’t get rejected.
Read articleHow to Scan a Document for Free (Phone, PC, and Without a Scanner) — 2026 Guide
Need to scan paperwork but don’t want to pay for an app or buy a scanner? Here are the fastest free ways to scan to PDF on iPhone, Android, Windows, and Mac—plus tips to make your scans look professional.
Read article